Portable Camp Lighting: Charging, Placement and Storage
- Prize
- One $855.97 grand package and ten $140.99 gear packages; $2,265.87 total per official rules
- Ends
- November 13, 2026 at 1:59 AM ET
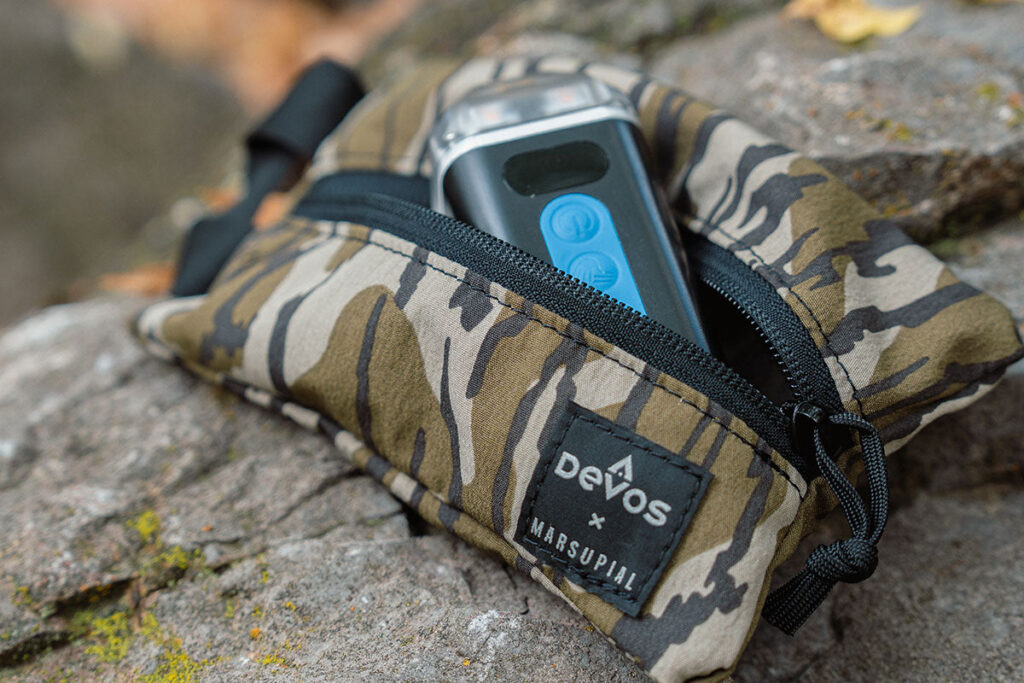
Wanna winoutdoor lights, gear and a $250 gift card?
$2,265.87 total across 11 prizes, per official rules. One base form entry per person/email; optional phone, referral and social bonuses under sponsor terms. November 12, 2026 at 11:59 PM Mountain (November 13 at 1:59 AM Eastern). 50 US states/DC; age 18+, 19 in AL/NE and 21 in MS.
Giveaway details + how to enter
Portable lighting belongs on an outdoor packing list alongside the equipment that powers and carries it. Choosing a light involves more than its brightest setting: where you put it, how it is charged and how the pieces fit into your luggage affect whether it is convenient to use. A short equipment worksheet can prevent duplicate purchases.
The Devos x Marsupial Before First Light Giveaway offers outdoor-lighting and gear prizes to 11 winners. Its working entry page is linked below. This guide considers practical lighting choices for camp and other outdoor setups; it does not treat advertised output as proof that a particular light is suitable for every activity or condition.
Describe the lighting job before comparing output
Start by naming the task: finding something in a bag, lighting a shared table or illuminating a wider camp area. These are different uses. Write where the light would be positioned and how many people need the space. Comparing products becomes easier when you are not asking one small light to solve every outdoor problem.
Check the modes and controls in the manufacturer’s current specifications. A maximum output figure describes one part of operation, not every setting or the entire experience. Look for the controls you would actually use. Consider whether you need a reachable switch, a mounting option or a way to carry the light between locations.
Think about placement before adding accessories. A product designed to hang, stand or attach to a surface needs an appropriate position. Use the manufacturer’s instructions for its mounting and support. Do not assume a magnet, hook or stand makes every nearby object a suitable attachment point or every uneven surface a stable base.
Account for the people sharing the area. Aim for a layout that lets people see the task without putting a bright light directly in another person’s view. Keep the arrangement consistent with site rules and the product’s instructions. Nearby camps and common areas may have their own expectations about lighting and quiet hours.
Make an inventory of the lights you already have. Record their charging needs, compatible cables and any missing components. A smaller replacement or better organization might solve the actual problem. Buying another powerful light is less useful if the recurring issue is that the right cable is always left at home.
Match charging arrangements to the trip
Write down how the product is charged and what is included. A charging port, a supplied cable and a power adapter are separate details. Check the exact specifications rather than assuming that a familiar connector guarantees every charger will work as intended. Use only the charging equipment and conditions approved by the manufacturer.
Compare runtime claims at the operating setting you expect to use. A long advertised runtime may refer to a lower setting than the headline brightness. Read any conditions attached to the claim. Do not combine the brightest output number from one line with the longest runtime from another and present them as simultaneous performance.
Plan a charging opportunity on the actual itinerary. A campsite with no available power and a stay with reliable indoor outlets create different preparation needs. If you are considering a separate power bank, review compatibility and handling instructions for both products. Keep unanswered charging questions visible instead of relying on a guess made while packing.
For air travel, check current airline and relevant transport guidance for the exact battery equipment. Restrictions depend on the product and itinerary, so an outdoor shopping guide cannot promise that every battery or power station belongs in a particular bag. Keep the product’s capacity information available for those checks.
Make a departure checklist that includes charging, inspection and packing the correct components. Test ordinary operation before leaving, following the manual. Do not improvise repairs or continue using damaged battery equipment. An equipment list is useful precisely because it lets you find problems while support and replacement options are easier to access.
Choose storage that protects the complete kit
Lay out the light, charging cable and permitted accessories together before selecting a pouch. Check the real dimensions rather than choosing a case based only on a lifestyle photograph. A pouch should make the equipment easier to organize without requiring you to force components into place or ignore the manufacturer’s storage instructions.
Separate fragile items from things likely to press against them. If a bag has dividers, plan what each section holds. Keep any protective covers supplied with the product. A padded case can be helpful for organization, but it is not a reason to assume that every device inside becomes waterproof, crushproof or suitable for rough handling.
Consider how you reach the equipment at the time it is needed. Frequently used items should not require unpacking the whole vehicle or bag. A simple packing map can help several people share one setup. Keep it flexible enough to account for food, clothing and other equipment that still needs space.
Choose a consistent place for cables. A small labeled compartment can prevent a compatible charger from being mixed up with another device’s accessories. Record the model information at home as well, so that questions about a replacement part do not depend on recognizing an unmarked cable in a crowded bag.
Include cleaning and drying in the return-home routine, using the product instructions. Check the light and pouch separately because their care requirements may differ. Store equipment only under the conditions the manufacturer specifies. Organizing the complete kit after a trip makes the next departure easier and shows which purchases are actually needed.
Keep the giveaway entry and optional bonuses distinct
The official base entry asks for a name and valid email address. Submit it once, then review any bonus actions offered by the current form. Optional phone, social or referral steps should be evaluated separately. You do not need to purchase outdoor gear to complete the basic online entry.
Use the working hunting-sweepstakes page linked in the final button. The older fall-giveaway address listed in the rules returned an error when checked. This article directs readers to the current destination found through Devos’s own site navigation. Check that you see the Before First Light promotion before providing information.
The rules identify one grand package and ten smaller packages, but some landing-page descriptions and bonus-limit wording differ. The official rules supply the prize values quoted below. Read the current form and rules together, and ask the sponsor about a conflict rather than assuming the larger bonus allowance automatically applies.
For photo bonuses, follow the specific permissions, tagging and hashtag requirements in the rules. Do not tag people who are not shown or publish somebody’s image without permission. Keep these actions separate from entering a referral code or providing a telephone number. Each optional method has its own requirements and may involve marketing or publicity choices.
After entering, keep an eye on the contact information supplied to the sponsor. This is a random drawing, not an immediate prize result. Freebie Mom Entry Tickets do not create a Devos submission or complete bonus actions. Use the final ENTER HERE to reach the official form and complete the permitted steps yourself.
Devos x Marsupial Before First Light Giveawayoutdoor lights, gear and a $250 gift card?
Rules and landing page differ on some prize descriptions and bonus limits. Values quoted here come from the official rules; review current form limits. No purchase necessary.
How to enter without a purchase
- Open the current Before First Light entry page below. We located this working page through Devos’s official site; the older fall-giveaway path returned a 404.
- Complete the base entry with first name, last name and a valid email. One base submission per person/email; no purchase required.
- Review optional phone, referral and social actions in the form and rules. Phone/text consent is optional. Photo actions require the specified permissions, tags and hashtag.
- Read both current form and rules because some landing-page descriptions and bonus limits conflict. Ask the sponsor about any unresolved difference rather than assuming the higher allowance.
Eleven gear winners
Official rules describe a $855.97 grand package with LightRanger 2000, motion sensor, Marsupial Gear Pod, LightRanger 500, pouch and $250 Mossy Oak card. Ten first-prize packages combine a LightRanger 500 and two pouches, valued at $140.99 each. The landing page contains differing descriptions; these figures follow the rules. Marketing email consent applies; optional partner/text choices have separate terms.
Claim post tickets once per article per day. Resets at midnight Eastern.
Your official giveaway entry
Click below, follow the official entry steps and submit your entry.
ENTER HEREOpen the official promotion, then complete and submit your entry.
Official rules · Sponsor rules control. Checked November 2, 2026.
Find more chances in our sweepstakes portal.
Keep going